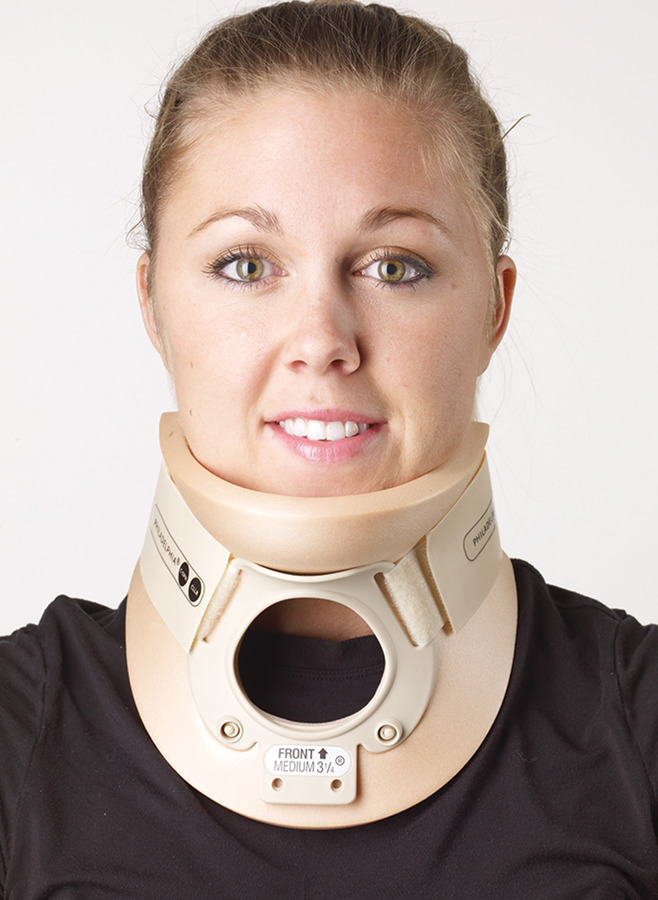
RIGID CERVICAL COLLAR W/TRACHEA
- Features two-piece design anatomically contoured to provide superior stability and comfort with large trachea opening for easy access.
- Indicated for immobilization for both extrication and rehabilitation, post-operative discectomy and spinal fusion.
- Constructed of durable plastic laminated to soft hypoallergenic foam with contact closure.
HCPCS Code: L0172
| Product Number | S | M | L |
| 2 1/4″ | 19-4121 | 19-4122 | 19-4123 |
| 3 1/4″ | 19-4131 | 19-4132 | 19-4133 |
| 4 1/4″ | 19-4141 | 19-4142 | 19-4143 |
| 5 1/4″ | 19-4151 | 19-4152 | 19-4153 |
| Sizing Guide | 10”-13” | 13”-16” | 16”-19” |
| Measurement taken from circumference of the neck at “Adam’s apple.” Height measurement taken from posterior portion of mandible to the clavicle directly below. |
|||
Wipe plastic shell with a damp cloth.
You may use disinfectant or mild soap and wipe dry.
For products with a removable liner, you may hand wash the liner in warm water with mild soap and air dry.
Do not use high temperatures to wash or dry.
Proper application of the Collar is as important as proper sizing for immobilization and patient comfort. The two-piece design consists of a FRONT piece and BACK piece which are packaged as a set. Always maintain the patient’s head in neutral alignment. These directions are guidelines only; follow a qualified healthcare provider’s instructions.
- Application:
- After selecting the properly sized Collar, apply the BACK piece of the Collar to the back of the patient’s neck.
- Center the Collar. The back arrow should point upward.
- Apply the FRONT piece of the Collar with the chin secured in the recess.
- Center the Collar and ensure neutral alignment.
- The FRONT piece OVERLAPS the BACK piece to ensure effective immobilization and comfort.
- The front arrow should point upward.
- With Velcro hook and loop fasteners, tighten the Collar with a bilateral adjustment.
- This will secure the patient’s cervical region in neutral alignment.
- Removal:
- Before removing the Collar, mark the position of the Velcro strap location to ensure re-application maintains the proper fit.
- With the Collar secured on the patient, unfasten the Velcro strap on the RIGHT side and then the LEFT side.
- Remove the Collar from the patient.